
........................................................
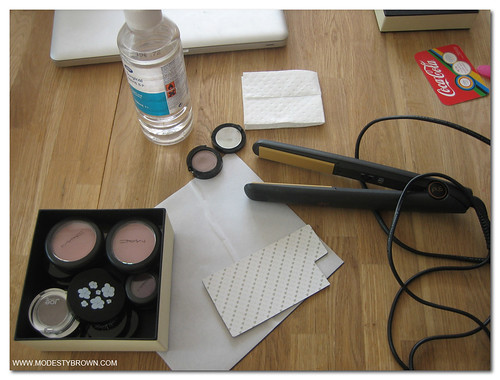
This is the kit I initially started out with having watched Petrilude's video on depotting with heat (only the greaseproof paper is missing from this picture). This kit works very well for depotting MAC eyeshadows and I will write a separate post about that should anyone be interested, BUT...this kit definitely doesn't work well on RBR containers. If you want to find out what happens when you try to depot an RBR eyeshadow using straighteners, take a look at the image below.
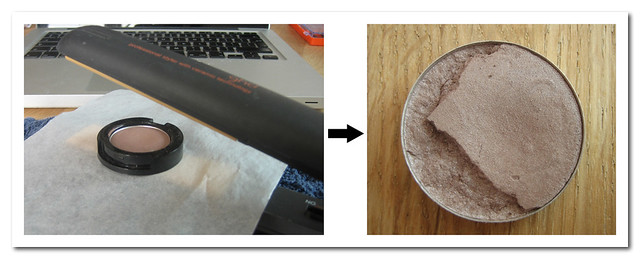 |
| Do NOT try this at home folks! |
If only I'd had spotted Drivol without the Frivol's comment about RBR depotting before I put pan to GHD, I might still have an intact Solstice Halcyon. The crucial difference between the MAC and RBR containers is that the base of MAC eyeshadows separates into two parts, so you only have a thin layer of plastic between the heat source and the base of the pan. Heating the RBR container with my straighteners didn't soften the glue sufficiently to allow me to lever the pan out, hence the breakage.
I had much more success using the following candle + poke method. I can't deny that this method isn't as elegant as using straighteners and the smell is infinitely less pleasant.
For this you will need:
- A candle
- A flat knife
- An old pencil
- Self adhesive magnetic discs if you are using a palette without a magnetised base*
- Surgical Spirit

STEP 1: Heat the base of the container to remove the label. Watch for a bubble forming under the label.
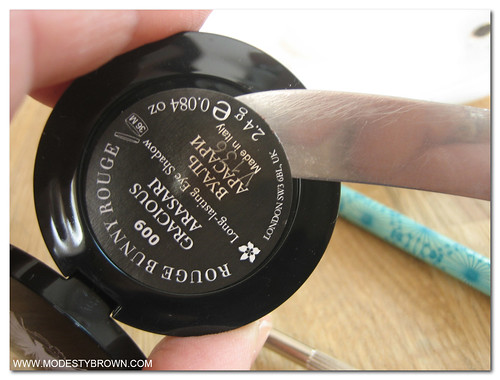
STEP 2: Once a bubble forms the glue should be sufficiently tacky for you to slide a knife underneath and remove the label in one piece. Put the label somewhere safe, sticky side up. It will remain sticky enough for you to apply to either the pan or the magnet.

STEP 3: Hold the container over the flame again, holding onto the lid to prevent burning your fingers. This time you are looking to melt the plastic so make sure you do this in a well ventilated room. The plastic will begin to bubble as it melts.
STEP 4: Once the plastic has softened sufficiently (this takes a bit of practice to gauge), press the pencil into the softened plastic and push the pan out from the back. I found it best to angle the pan downwards over a towel to avoid damage. Sometimes the pan will pop out completely at this point and sometimes it pushes it out enough for you to lever it the rest of the way with a knife.
STEP 5: Once the pan is cool enough to touch, clean up the base using a cotton pad soaked with surgical spirit.

STEP 6: Apply the self adhesive magnet (if using) to the base of the pan, followed by the eyeshadow label that you peeled off earlier.
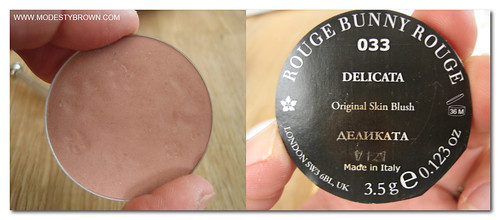
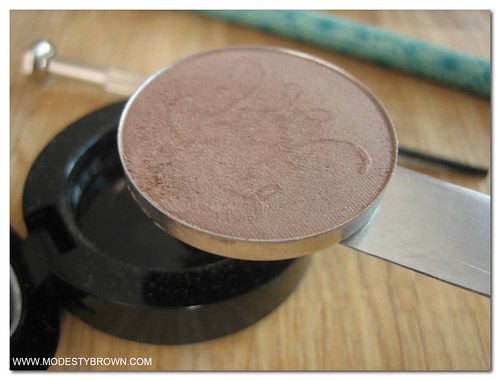
I used this method to depot a blusher as well as my RBR eyeshadows. I found with the blusher that the glue loosened sufficiently for me to use a knife to lever it out. However, my personal recommendation is 'when in doubt, poke it out'!
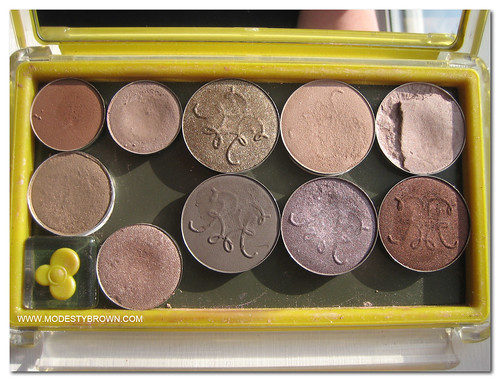
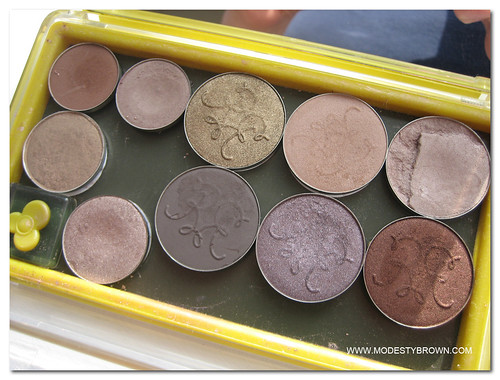
Here are the finished eyeshadows in my Unii palette. As you can see, only Solstice Halcyon suffered any damage during the process. The empty eyeshadow pots don't look as mangled as you might expect either as the plastic re-sets as it cools.


* I mentioned that you may or may not need to apply magnets to the base of the pans. I have an old style Unii palette and I need to apply magnets to the pans to make them stick to the palette. It wasn't until I started shopping around for a new custom palette that I realised both the new style Unii palette and the Z palettes have a magnetic base which metals pans stick to directly. If you are using one of these new style palettes you do not need to apply magnetic discs, instead you apply the label to the base of the pan and stick directly into the palette.
I really hope this post is instructional, although I suspect many of you will be horrified by what I have done! If you do have any questions, feel free to ask.
Beautiful job! I didn't bother with the label, but now I feel silly for not having peeled it off.
ReplyDeleteI am so bummed your shadow cracked using the flat iron method. It looks like Solstice Halcyon, too. :( I wonder if my iron has kryptonite strength because my pan popped right out; in fact I could see it raising itself from the plastic, so I knew what it was done, and the only reason I gouged the surface was because I was clumsy.
Excellent tips! And the shadows look so nice nestled in your Unii.
It is indeed Solstice Halcyon. It was silly to start with that one first really. I wonder if I wasn't patient enough with the hot iron? I kept on putting it back on but nothing happened. It didn't even get hot enough to remove the label!
DeleteThings got even worse for SH as I dropped my Unii palette the next day, ironically trying to protect it from Miss MB's clutches. I re-pressed it with surgical spirits and it's on my windowsill at the moment trying to lose the medicinal pong! A sad day.
Oh, no! I am surprised the Unii didn't protect it, with that thick rubber gasket and all. Do you have the new metallized-back version? I do but I kind of prefer old-skool. :)
DeleteI hope your SH made it through surgery and the prognosis is good!
I have an old school Unii. I knew it was going to get damaged when it hit the deck as my pans slide around in there if I use it for travel. It's fine though, it's not pretty but it's safe from further crumbling!
DeleteYou did it! I think it's a great idea and I'll be doing the same shortly. Just a quick question though - say you changed your mind, are the pots still usable? Could you put the pan back if you wanted to?
ReplyDeleteHi Gillian. Yes, I'm pretty sure I could put them back in the pots if I changed my mind. This is one of the pans post melting - http://flic.kr/p/bUD7C9. I'm really pleased I braved it and I've used the blusher everyday since.
DeleteThat's good to know - makes me feel a bit braver about doing it!
DeleteGreat job! I wish I had started with the press from the bottom method as well, would've saved a couple shadows that now reside in pigment jars (I gave up on pressing them back into pans). Looking back, I should have ventilated the room better too; my eyes were so irritated!
ReplyDeleteOh no, your poor eyes. Pushing them out from behind really seems to limit damage to the pans.
DeleteThank you for this! I am actually eagerly awaiting my z palettes right now as I'd ordered them a couple weeks ago planning to depot my RBR and LMdB. Great work!
ReplyDeleteI'd love to hear how you get on depotting the LMdB. Will you just do your LMdB singles?
DeleteOH NO!!! POOR SH!!
ReplyDeleteI have depotted mine too and into a UNI palette would you believe. I used a very sharp knife though....
How do you utilise the sharp knife? Is that to lever the pan out or cut the plastic?
DeleteI too found that the candle/poke method worked best on my RBRs. I gouged my Delicate Hummingbird in the process of finding that out :P If you have rubbing alcohol on hand, you can easily save a crumbling eyeshadow by wetting the loose bits and pressing them back into place. That has worked for me so far!
ReplyDeleteI've used surgical spirit to repress the eyeshadow (we don't get rubbing alcohol here but I assume this is similar) as I stupidly dropped the palette the day after cracking SH. Poor Delicate Hummingbird, did it survive the incident?
DeleteI admire your fortitude, I would have given up long ago. I wonder if you banded all small people from the house? I know that when I tried something similiar years ago (we are probably talking pre historic times remember in that there was no youtube tutorials) the air was blue with my frustration and my children had to be taken out for a long walk!
ReplyDeleteIndeed, I was completely alone in the house. There's no way I could have attempted it with a house full!
DeleteAs I don't have a flat iron - does EVERYONE own a flat iron these days?? - I just put some foil over the plate of my stove,to prevent the plastic melting onto it, turned up the heat & popped the pot of shadow onto the foil. I haven't done it with my RBR but I did all my By Terry shadows and plenty of MAC this way with no casualties. Works just as easily as a flat iron I assume. Sadly, I don't use the shadows as often as I did before though:( Yes, it IS space-saving and more practical to see all the shades at once but, call me peculiar, they just aren't as individually special to me anymore without their pretty packaging.
ReplyDeleteThat sounds like a sensible way to do it Buggsiebee, it sounds very similar to the oven method. What a shame that it spoiled your enjoyment of them. I suppose it becomes even more clear how many of them come from the same factory in Italy without their unique housing!
Delete*dignified silence*
ReplyDeleteHave you tried the oven method. Bake at 215 degrees for about 5 minutes on a cookie sheet covered with aluminum. Take it out, use an Xacto to pry out the pan from the plastic.
ReplyDeleteWorked for me. Goss Makeup Artist had that technique.
:)BeautyJones
I spotted the oven method after looking for a candle tutorial. I've never tried it myself. I must look to see if you can get a Xacto knife here. I'd never seen or heard of one prior to watching the Petrilude video.
Delete*weeping softly* SH is so beautiful even when broken. Perhaps once I work through my supply of accumulated makeup I may lift my makeup ban and be able to get my hands on one.
ReplyDeleteHave you put yourself on a ban Jane? SH will definitely be waiting for you when the pan lifts. I have to say I was horrified at how many similar taupe-y colours I had once I started depotting!!
DeleteFraid so, Jane. I may need to apply my eyeshadows daily on husband and two children to even make a dent (or hit any pan). I am moving from Asia back to the US in a month and thinking about how to pack all my stash is causing me a lot of anxiety. I will just be reading your lovely blog and loving all your taupes and RBRs!
DeleteThank you for bringing this to a wider audience -- save the Halcyons! ;)
ReplyDeleteFortunately RBR's creamy texture means it won't suddenly crumble to infinity one day down the road, just in case you needed an Illamasqua depotting prophecy....
The poor Halcyons always seem to fall victim to the knife! I desperately wished I'd seen your comment before disaster struck. Like a fool, I managed to drop the Unii palette the next day and Halcyon broke up further. I had to set upon it with surgical spirits and it's fine now, if a little lumpy. People must be aghast at it in my blog posts now.
DeleteYou did a great job! Only one casualty is amazing.
ReplyDeleteThank you! I was pleased I succeeded in the end.
DeleteGreat tutorial, thanks so much for posting! It is so nice to be able to conserve space and see all of your colors together in one place! :)
ReplyDeleteThanks MM. I do think it's nice to have them all in one place. I practically drooled at Perilously Pale's depotted LMdB collection!
Deleteohh thank you so much for this. I've been looking for a way to depot my RBR shadows and wasn;t too brave on doing the poke method until I saw yours. Might start depotting them this weekend.
ReplyDeleteI'm so pleased the post is useful. You might like a look at Worship Blues post on her RBR depotting adventure. She managed to do it with the straightening irons and it sounds like it works as long as you leave them pots on for longer than you would for MAC.
Delete