
There were four key trends: Tough Love, Amber Gris, Disco-Tech and Modernist. As part of the workshop we watched a trends video which included some of the looks used in the shows as well as soundbites from the principal makeup artists. Cher Webb, the Senior Artist that took the workshop, demonstrated an example of both the Modernist and Tough Love trends which I shared in my initial post.
Amber Gris
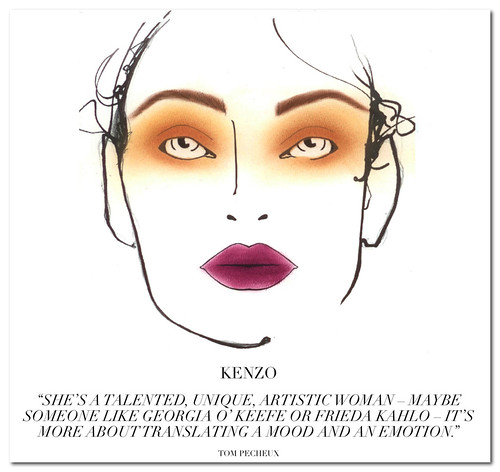
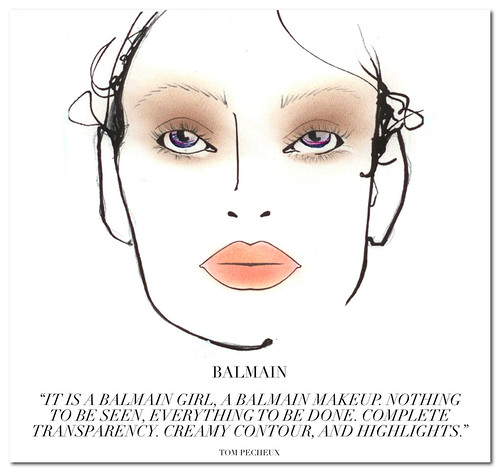
The looks which fit the Amber Gris trend used makeup inspired by skin tones. It was very much a watercolour trend, with colours applied as washes and stains. This look is all about texture and techniques with products applied using fingers. The key is for it to look soft but still a little bit edgy. The colour palette was Amber to Grey and every colour in-between. The looks created by Tom Pecheux for both Kenzo and Balmain epitomize this trend.
Disco-Tech
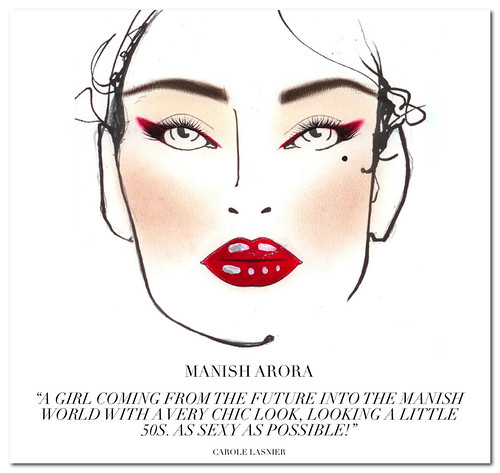
The Disco-Tech trend was all about perfect skin with some element of striking colour. Some were over the top, bold looks. Others employed very graphic styles with sculpted lines on eyes or lips. Examples of the Disco-Tech trend include the looks created for Manish Arora and Louise Gray.

I thought it very interesting that none of the looks really screamed Autumn or Winter. Some of the looks that fell into the Amber Gris category used a deep blackcurrant lip but as an imperfect stain. Certainly many of the looks described as 'Disco-Tech' wouldn't instantly evoke images of cold weather. It made me wonder how difficult it must be for artists to come up with appropriate looks when they're working a season ahead? The AW11 shows took place in February and March this year.
Cher concentrated on the the Modernist and Tough Love trends during the demonstration. Rather than turn this into an epic, I will post the breakdown of the products used to create both looks separately, as well as the definitions and key elements for those trends. Instead I want to focus now on the information that I picked up during the workshop that I found really interesting as a non-makeup artist.
What I learned:
Feline pencil is now part of MAC's permanent collection. Feline seems to be a bit like marmite, you either love it or hate it but I might actually get to try it now it's not limited edition.
You can use the natural Mineralised Skin Finishes powders for anything, for contouring and even as eyeshadow. In fact, it was interesting to note that Cher didn't use a single 'cheek' product in either of the demostrated looks. See my comment about the gloss below.
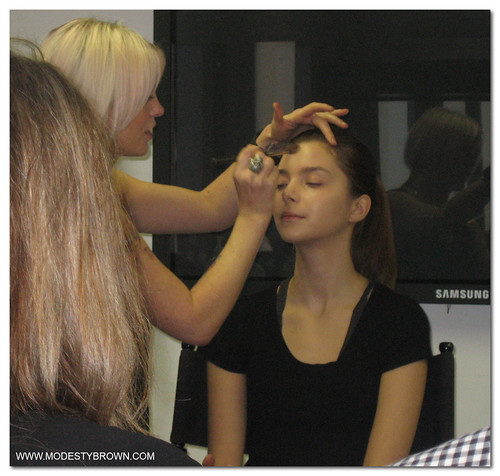
Studio Sculpt foundation is best applied with fingers. Studio Sculpt has quite a waxy consistency. It doesn't give a great finish when applied with a brush as it requires warmth to melt into the skin. Applying with fingers creates an amazing finish and model Selena's face looked flawless. I am very tempted to give it a try myself.
You don't necessarily have to go with a skins undertone when it comes to NW/NC foundation selection. I know the MAC system of NC and NW foundations confuses a lot of people. My understanding has always been that if your skin has pinky undertone, you should opt for an NW shade and if you have a yellow undertone, you should use NC. Cher explained that it's perfectly ok to play with the rules and choose a shade to colour correct where appropriate. For example, if the skin looks too sallow go for NW. If the skin has a lot of redness choose an NC.
When it comes to concealing the undereye area, NW will counteract blue colour under the eye and yellow (NC) will brighten. You can use a combination of both an NW and NC concealer to disguise dark circles.
Gloss can make the most amazing highlighter. I think this was one of the most shocking revelation for me. I've seen gloss on the lips and eyes but never on the cheeks. In the image below you can see how MAC Clear Gloss Texture looks when applied to the cheek bone (Cher applied the gloss using a synthetic brush and then softened using her fingers). Clear Gloss Texture is a Pro product and like others, I wondered if it might feel uncomfortable on the skin but apparently the texture is quite similar to vaseline rather than a tacky lip gloss.
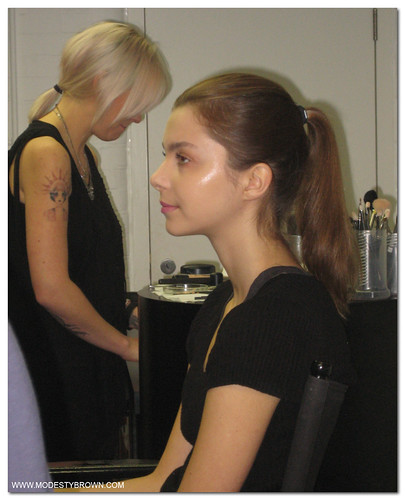
Makeup artists don't always have time to start from scratch. Despite realising how hectic things get backstage at Fashion shows, for some reason I just assumed that artists always started with a bare face. With models running around from show to show, I suppose it's a big ask to cleanse and prep every time. Cher explained that often artists only have time to refresh and build on what is already there. She demonstrated how this was done when transitioning from the first to the second look during the workshop. She gently wiped away colour from the eyes with a cotton bud and blotted colour away from the lips. I suppose a product like Bioderma would be quite useful for this sort of job. Cher then refreshed the model's face using Studio Moisture Fix and used Select Moisturecover concealer to touch up. I imagine this kind of technique would be handy when it comes to preparing for a night out when you haven't got time to take everything off first.
I'm sure there are a few other things that I am forgetting but it's these snippets of information that really stood out for me. As ever, it was fascinating to watch a professional makeup artist at work.
Images of face charts provided by M·A·C Cosmetics
*I probably should have mentioned this in the previous post but in case anyone was curious, this wasn't a blogger event. The workshop was part of MAC's regular schedule of events that are held for MAC Pro members. I paid to attend the workshop.
This sounds great, I'd love to go to one of these.
ReplyDeleteI love Studio Sculpt, it's a great foundation, unfortunately I got the wrong shade for me but I wouldn't hesitate to buy again!
what a great post! sounds like an awesome workshop and i enjoyed the information that you provided
ReplyDeleteThanks for the tips! I would love to hear more about the Amber Gris look.
ReplyDeleteThis was a really informative post! The tips about Studio Sculpt, the MSFN and gloss were great. I totally want to try out a gloss or balm as a cheek highlighter now. :)
ReplyDeleteGreat post, Jane. Thanks for sharing! x
ReplyDeleteSounds great Jane! Good tips.
ReplyDeletex
@Charlie: It was really interesting. I'm really fascinated to try the Studio Sculpt, is it one of their foundations that tends to run darker do you know?
ReplyDelete@socialitedreams: Thank you, I'm glad you enjoyed it.
@Leigh: You're welcome. Unfortunately we didn't cover Amber Gris in any more detail than I have shown here. I do have some other charts though which include some suggestions of products for this kind of look. Maybe I could try to have a go at a look based on these?
@SilhouetteScreams: I intrigued to try a gloss as a highlighter too. It really looked fantastic on the model.
@Marina and Nic: Thank you both, I really looked forward to sharing my adventure!
Jane x